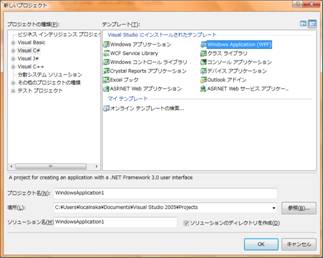
まずプロジェクトを作成します。
VS2005
まずXAMLが開きます。
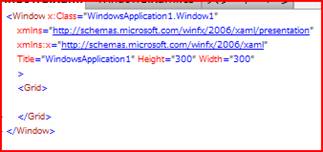
XAMLとCSが2つ入ってます。
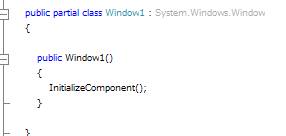
ソースの中身は簡単
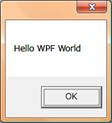
とりあえずメッセージボックスで出しましょう。
MessageBox.Show("Hello WPF World");
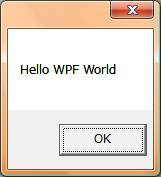
完成
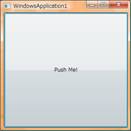
DEMO2
Gridの中にボタンを配置します。
ボタンの表面はContentで定義します。
クリックイベントはClickで定義します。
<Grid>
<Button Content="Push Me!" Click="Button_Click"/>
</Grid>
続いてソースに記載します。
public void
Button_Click ( object sender, RoutedEventArgs args)
{
MessageBox.Show("Hello WPF World");
}
このvoid戻りの、objectと、RoutedEventArgsというのはお約束になり、ほとんどのイベントがこれで受け取ることができます。
イベントの定義
Button1.OnClick += Button_Clickのようなコードは記載する必要がありません。
起動
DEMO3
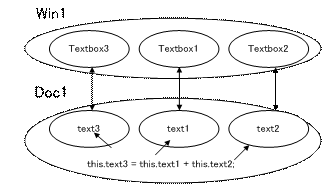
ドキュメントクラスを作成します。
WPFの場合にはpublicなプロパティにする必要があるので、かならずプロパティにしてください。
public class Doc
{
public string
text1{get { return
_text1; }set { _text1 = value; }}
public string
text2{get { return
_text2; }set { _text2 = value; }}
public string
text3{ get
{ return _text3; } set
{ _text3 = value; }}
private string
_text1, _text2, _text3;
public void
Add() {this.text3 = this.text1
+ this.text2; }
}
これで必要な実装クラスは完成です。
これを画面に割り当てます。
<Window x:Class="WindowsApplication1.Window1"
xmlns="http://schemas.microsoft.com/winfx/2006/xaml/presentation"
xmlns:x="http://schemas.microsoft.com/winfx/2006/xaml"
xmlns:WindowsApplication1="clr-namespace:WindowsApplication1;assembly="
Title="WindowsApplication1" Height="300" Width="300"
>
<Window.DataContext>
<WindowsApplication1:Doc/>
</Window.DataContext>
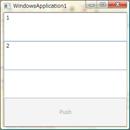
<Grid>
<Grid.RowDefinitions>
<RowDefinition Height="*"/>
<RowDefinition Height="*"/>
<RowDefinition Height="*"/>
<RowDefinition Height="*"/>
</Grid.RowDefinitions>
<TextBox Text="{Binding Path=text1}"/>
<TextBox Text="{Binding
Path=text2}" Grid.Row="1"/>
<TextBox Text="{Binding
Path=text3}" Grid.Row="2"/>
<Button Content="Push" Grid.Row="3" Click="Add"/>
</Grid>
</Window>
ビューの処理としてドキュメントのAddを呼び出すように記載します。
public void
Add ( object sender, RoutedEventArgs
args)
{
Doc d = this.DataContext
as Doc;
if ( d != null
)
{
d.Add();
}
}
実行してみましょう。

ボタンを押しても反映されるはずが反映されません。
デバッグしてみましょう。
デバッグではうまく値が反映されています。
これのドキュメントからビューへの反映は、値が変わったことを通知する必要があります。
public class Doc : INotifyPropertyChanged
{
public string text1 {
get { return
_text1; } set { _text1 = value; this.FirePropertyChanged("text1");}
}
public string text2 {
get { return
_text2; } set { _text2 = value; this.FirePropertyChanged("text2");
} }
public string text3 {
get { return
_text3; } set { _text3 = value; this.FirePropertyChanged("text3");
} }
private string
_text1, _text2, _text3;
public void Add() { this.text3 = this.text1
+ this.text2; }
public event
PropertyChangedEventHandler PropertyChanged;
protected
void FirePropertyChanged(string propertyName) { if
(this.PropertyChanged != null) this.PropertyChanged(this, new PropertyChangedEventArgs(propertyName)); }
}
この部分を追記します。
そして実行

拍手!!
DEMO4
テキスト1とテキスト2に値が書かれていないとボタンを押せなくしたい。
まずはXAMLを変更します。
<Button Content="Push" Grid.Row="3" Click="Add" IsEnabled="{Binding Path=ButtonEnabled}"/>
ButtonEnabledにバインディングすることにします。
public bool
ButtonEnabled
{
get { return
string.IsNullOrEmpty(this.text1)
== false && string.IsNullOrEmpty(this.text2) == false;
}
}
これで実行します。
あれうまくいきません。
入力しても有効にならないのです。
これは先ほど説明したNotifyPropertyChangedによる通知を上げていないためです。
解決方法は2種類あります。
解決策1
計算のもとになっている値の変更時にButtonEnabledも変更通知を上げてもらう。
public string
text1 { get { return
_text1; } set { _text1 = value; this.FirePropertyChanged("text1"); this.FirePropertyChanged("ButtonEnabled");
} }
public string
text2 { get { return
_text2; } set { _text2 = value; this.FirePropertyChanged("text2"); this.FirePropertyChanged("ButtonEnabled");
} }
実行
うまくいきました。
解決策2
Text1とtext2の変更時に通知が上がるわけですから、その通知を利用します。
public Doc()
{
this.PropertyChanged += delegate(object
sender, PropertyChangedEventArgs e)
{
if (e.PropertyName == "text1" || e.PropertyName == "text2")
{
this.FirePropertyChanged("ButtonEnabled");
}
};
}
実行
成功
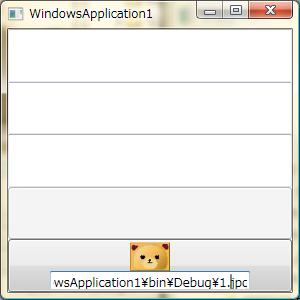
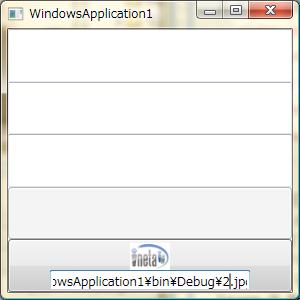
おまけのDemo5
<Button Grid.Row="4" Click="Add" >
<StackPanel>
<Image Source="{Binding
Path=Text,ElementName=パス}" Width="40"/>
<TextBox x:Name="パス" Width="200"/>
</StackPanel>
</Button>
ButtonのContentに1つのコントロールを配置できます。
複数置きたければPanel(枠)を置けば、その中に複数のコントロールを置くことができます。
Imageとテキストボックスを配置します。
X:Nameでコントロールに名前をつけられます。
ImageのSourceにこのパスというコントロールのTextプロパティの中身とバインドするように設定します。
さて実行